
Overview
What is jQuery
What is jQuery
First, let’s take a look at an example HTML manipulation with JavaScript. To get the element with the id=”start” and change its html to “Go” we will need to do the
Following:
var el = document.getElementByID("start");
el.innerHTML = "GO"
To do the same manipulation with jQuery, we need just a single line of code:
$("#start").html("Go");
// js version
var el=document.getElementById("start");
el.innerHTML="GO";
// jquery version
$("#start").html("GO");
You will learn about the new syntax in the coming lessons, but as you can see, the code is much shorter and easier to understand.
Another great advantage of jQuery is that you do not need to worry about browser support, your code will run exactly the same in all major browsers, including Internet Explorer 6!
Getting Started
Getting Started
We will use the CDN from the official jQuery website. To start using jQuery, we first need to add it to the head of our HTML document using the script tag:
<!DOCTYPE html>
<html lang="en">
<head>
    <meta charset="UTF-8">
    <title>Learn jQuery</title>
    <script src="https://code.jquery.com/jquery-3.5.1.min.js"></script>
</head>
<body>
</body>
</html>
jQuery is a JavaScript library, so it has the .js file extension.
It is a good practice to wait for the HTML document to be fully loaded and ready before working with it. For that we use the ready event of the document object:
$(document).ready(function() {
   // jQuery code goes here
});
The $ is used to access jQuery. From here, the code accesses the document object and defines a function to be called when the document’s ready event is fired. This prevents any jQuery code from running before the document is finished loading. Since the code above is used in almost all cases when using jQuery, there is a handy shortcut for writing it:
$(function() {
   // jQuery code goes here
});
This code performs the same task as the longer code above.
Start someting here,:
<!DOCTYPE html>
<html lang="en">
<head>
    <meta charset="UTF-8">
    <title>Learn jQuery</title>
    <script src="https://code.jquery.com/jquery-3.5.1.min.js"></script>
</head>
<body>
<div id="start">Start</div>
<script src="static/js/so.js"></script>
</body>
</html>
$(function () { // wait for the page to be loade first.
    $("#start").html("Go");
});
This changes the HTML of the element with id=”start” to “Go!”.
Syntax
jQuery is used to select (query) HTML elements and perform “actions” on them.
Basic syntax is: $(“selector”).action()
- - The $ accesses jQuery.
- - The (selector) finds HTML elements.
- - The action() is then performed on the element(s).
for example ;
$("p").hide(); // hides all <p> elements
$(".demo").hide();// hides all elements with class="demo"
$("#demo").hide(); // hides the elment with id="demo"
Looking back at the code from our previous example:
$("#start").html("Go!");
This selects the element with the id=”start” and calls the html() method for it. The html() method is used to change the HTML content of an element.
jQuery uses CSS syntax to select elements.
Selectors
Selectors
As you have seen in the previous lesson, the jQuery selectors start with the dollar sign and parentheses: $().
The most basic selector is the element selector, which selects all the elements based on the element name.
$("div") // selects all the <div> elements
Next are the id and class selectors, which select the elements by their id and class name:
$("#test") // select the element with the id="test"
$(".menu") // selects the elements with the class="menu"
You can also use the following syntax for selectors:
$("div.menu"); // all <div> elements with class="menu"
$("p:first"); // the first <p> elements
$("h1,p"); // all <h> and all <p> elemetns
$("div p"); // all <p> elements that are descendants of a <div> elements
$("*") // all elements of the DOM
Selectors make accessing HTML DOM elements easy compared to pure JavaScript.
Attributes and Content
Get & Set Attribute Values
Attributes
We can manipulate attributes assigned to HTML elements easily through jQuery. href, src, id, class, style are all examples of HTML attributes.
The attr() method is used for getting the value of an attribute. For Example:
<!DOCTYPE html>
<html lang="en">
<head>
    <meta charset="UTF-8">
    <title>Learn jQuery</title>
    <script src="https://code.jquery.com/jquery-3.5.1.min.js"></script>
</head>
<body>
<div id="start">Start</div>
<a href="https://azat.ai">Click here</a>
<script src="static/js/so.js"></script>
</body>
</html>
$(function () { // wait for the page to be loade first.
    $("#start").html("Go");
    var val=$("a").attr("href");
    alert(val);
});
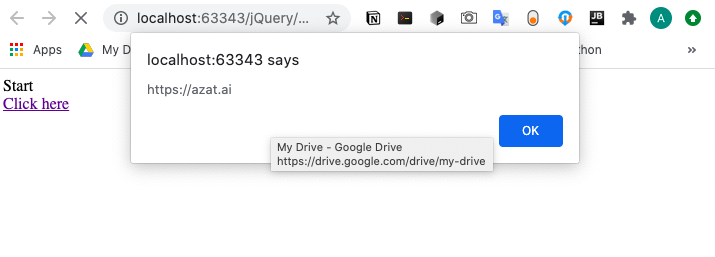
In the code above we selected and alerted the value of the href attribute of the element.
The attr() method also allows us to set a value for an attribute by specifying it as the second parameter.
<!DOCTYPE html>
<html lang="en">
<head>
    <meta charset="UTF-8">
    <title>Learn jQuery</title>
    <script src="https://code.jquery.com/jquery-3.5.1.min.js"></script>
</head>
<body>
<div id="start">Start</div>
<a href="https://azat.ai">Click here</a>
<a href="#" id="attrset">Click here too</a>
<script src="static/js/so.js"></script>
</body>
</html>
$(function () { // wait for the page to be loade first.
    $("#start").html("Go");
    $("#attrset").attr("href","https://azat.ai");
});
Removing Attributes
Removing Attributes
You can also remove attributes from HTML elements. The removeAttr() method is used for removing any attribute of an element. In the example below we remove the border and class attributes of the table:
$("table").removeAttr("borders");
$("table").removeAttr("class");
Get & Set Content
Get Content
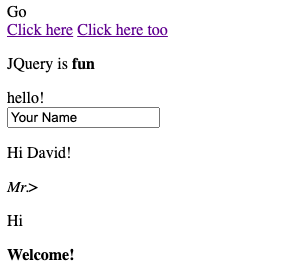
There are several methods for manipulating the content of HTML elements via jQuery. The html() method is used to get the content of the selected element, including the HTML markup. For example:
<p>
  JQuery is <b>fun</b>
</p>
<!DOCTYPE html>
<html lang="en">
<head>
    <meta charset="UTF-8">
    <title>Learn jQuery</title>
    <script src="https://code.jquery.com/jquery-3.5.1.min.js"></script>
</head>
<body>
<div id="start">Start</div>
<a href="https://azat.ai">Click here</a>
<a href="#" id="attrset">Click here too</a>
<p>
    JQuery is <b>fun</b>
</p>


<script src="static/js/so.js"></script>
</body>
</html>
$(function () { // wait for the page to be loade first.
    $("#start").html("Go");
    $("#attrset").attr("href","https://azat.ai");
    var val=$("p").html();
    alert(val);
});
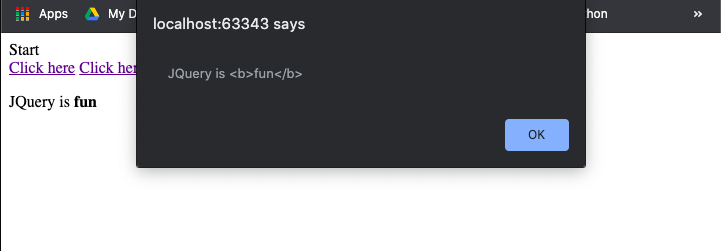
Notice, that the HTML markup (the tags) is also returned, If you need only the text content, without the HTML markup, you can use the text() method:
$(function () { // wait for the page to be loade first.
    $("#start").html("Go");
    $("#attrset").attr("href","https://azat.ai");
    var val=$("p").text();
    alert(val);
});
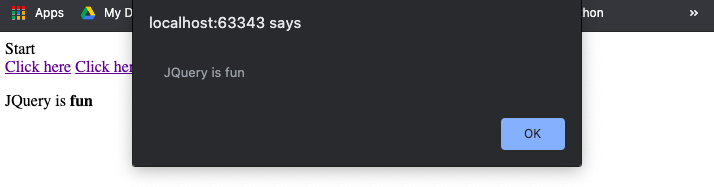
The html() and text() methods can be used for all HTML elements that can contain content.
Set Content
The same html() and text() methods can be used to change the content of HTML elements.
The content to be set is provided as a parameter to the method, for example:
<!DOCTYPE html>
<html lang="en">
<head>
    <meta charset="UTF-8">
    <title>Learn jQuery</title>
    <script src="https://code.jquery.com/jquery-3.5.1.min.js"></script>
</head>
<body>
<div id="start">Start</div>
<a href="https://azat.ai">Click here</a>
<a href="#" id="attrset">Click here too</a>
<p>
    JQuery is <b>fun</b>
</p>
<div id="test">
    <p>some text</p>
</div>
<script src="static/js/so.js"></script>
</body>
</html>
$(function () { // wait for the page to be loade first.
$("#start").html("Go");
$("#attrset").attr("href","https://azat.ai");
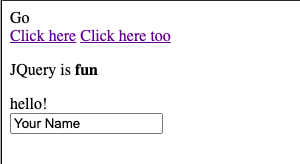
$("#test").text("hello!");
});
Original :

hanged:

If the content you are setting contains HTML markup, you should use the html() method instead of text().
val()
val()
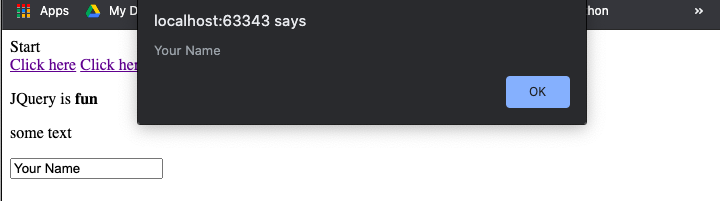
We have seen in the previous lesson how we can manipulate the content of HTML elements using the text() and html() methods. Another useful method is the val() method, which allows us to get and set the values of form fields, such as textboxes, dropdowns, and similar inputs. For Example:
<!DOCTYPE html>
<html lang="en">
<head>
    <meta charset="UTF-8">
    <title>Learn jQuery</title>
    <script src="https://code.jquery.com/jquery-3.5.1.min.js"></script>
</head>
<body>
<div id="start">Start</div>
<a href="https://azat.ai">Click here</a>
<a href="#" id="attrset">Click here too</a>
<p>
    JQuery is <b>fun</b>
</p>
<div id="test">
    <p>some text</p>
</div>
<input type="text" id="name" value="Your Name">
<script src="static/js/so.js"></script>
</body>
</html>
$(function () { // wait for the page to be loade first.
    $("#start").html("Go");
    $("#attrset").attr("href","https://azat.ai");
    $("#test").text("hello!");
    alert($("#name").val());
});
Similarly, you can set the value for the field by providing it as a parameter to the val() method.
The following jQuery methods are available to get and set content and attributes of selected HTML elements: text() sets or returns the text content of selected elements. html() sets or returns the content of selected elements (including HTML markup). val() sets or returns the value of form fields. attr() sets or returns the value of attributes. removeAttr() removes the specified attribute.
Adding Content
Adding Content
As we have seen in the previous lessons, the html() and text() methods can be used to get and set the content of a selected element. However, when these methods are used to set content, the existing content is lost.
jQuery has methods that are used to add new content to a selected element without deleting the existing content:
- append() inserts content at the end of the selected elements.
- prepend() inserts content at the beginning of the selected elements.
- after() inserts content after the selected elements.
- before() inserts content before the selected elements.
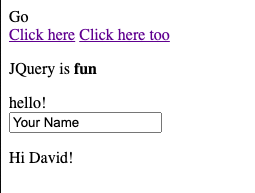
The append() method inserts content AT THE END of the selected HTML element.
<!DOCTYPE html>
<html lang="en">
<head>
    <meta charset="UTF-8">
    <title>Learn jQuery</title>
    <script src="https://code.jquery.com/jquery-3.5.1.min.js"></script>
</head>
<body>
<div id="start">Start</div>
<a href="https://azat.ai">Click here</a>
<a href="#" id="attrset">Click here too</a>
<p>
    JQuery is <b>fun</b>
</p>
<div id="test">
    <p>some text</p>
</div>
<input type="text" id="name" value="Your Name">
<p id="demo">Hi </p>
<script src="static/js/so.js"></script>
</body>
</html>
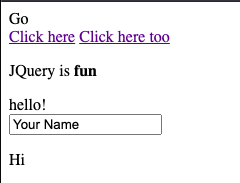
$(function () { // wait for the page to be loade first.
    $("#start").html("Go");
    $("#attrset").attr("href","https://azat.ai");
    $("#test").text("hello!");
    $("#demo").append("David!");
});
Similarly, the prepend() method inserts content AT THE BEGINNING of the selected element.
The jQuery after() and before() methods insert content AFTER and BEFORE the selected HTML element.
<!DOCTYPE html>
<html lang="en">
<head>
    <meta charset="UTF-8">
    <title>Learn jQuery</title>
    <script src="https://code.jquery.com/jquery-3.5.1.min.js"></script>
</head>
<body>
<div id="start">Start</div>
<a href="https://azat.ai">Click here</a>
<a href="#" id="attrset">Click here too</a>
<p>
    JQuery is <b>fun</b>
</p>
<div id="test">
    <p>some text</p>
</div>
<input type="text" id="name" value="Your Name">
<p id="demo">Hi </p>
<p id="demo2">Hi</p>
<script src="static/js/so.js"></script>
</body>
</html>
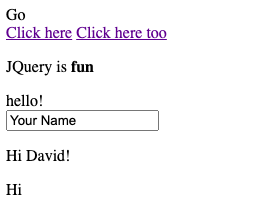
$(function () { // wait for the page to be loade first.
    $("#start").html("Go");
    $("#attrset").attr("href","https://azat.ai");
    $("#test").text("hello!");
    $("#demo").append("David!");
    $("#demo2").before("<i>Mr.</i>>");
    $("#demo2").after(("<b>Welcome!</b>"))
});
Adding New Elements
The append(), prepend(), before() and after() methods can also be used to add newly created elements. The easiest way of creating a new HTML element with jQuery is the following:
var txt = $("<p></p>").text("Hi");
The code above creates a new <p> element, which contains the text Hi and assigns it to a variable called txt.
Now, we can use that variable as a parameter of the above mentioned methods to add it to our HTML, for example:
<p id="demo">Hello</p>
$(function() {
  var txt = $("<p></p>").text("Hi");
  $("#demo").after(txt);
});
This will insert the newly created <p> element after the #demo paragraph. You can also specify multiple elements as arguments for the before(), after(), append(), prepend() methods by separating them using commas: $(“#demo”).append(var1, var2, var3).
The above mentioned syntax for creating elements can be used to create any new HTML element, for example $(“<div></div>”) creates a new div.
Manipulating CSS
Adding & Removing Classes
Manipulating CSS
jQuery has several methods for CSS manipulation.
The addClass( ) method adds one or more classes to the selected elements. For example:
<!DOCTYPE html>
<html lang="en">
<head>
    <meta charset="UTF-8">
    <title>Learn jQuery!</title>
</head>
<body>
<!-- Start -->
<div>Some text</div>
<!-- End -->
<script src="https://code.jquery.com/jquery-3.5.1.min.js"></script>
<script src="static/js/so.js"></script>
</body>
</html>
.header{
    color: blue;
    font-size:x-large;
}

$(function () {
//jQuery Code Below:
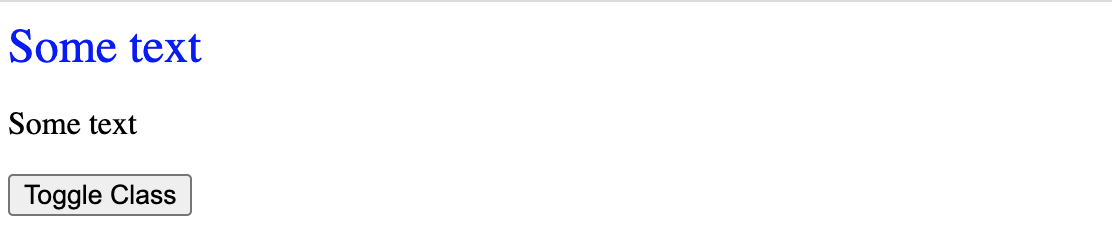
$("div").addClass("header");
});

The above code assigns the div element the class “header”.
To specify multiple classes within the addClass() method, just separate them using spaces. For example, $(“div”).addClass(“class1 class2 class3”).
Manipulating CSS
The removeClass() method removes one or more class names from the selected elements. For example:
$("div").removeClass("red");
The code above removes the class “red” from the div element.
Again, multiple class names can be specified by separating them using spaces.
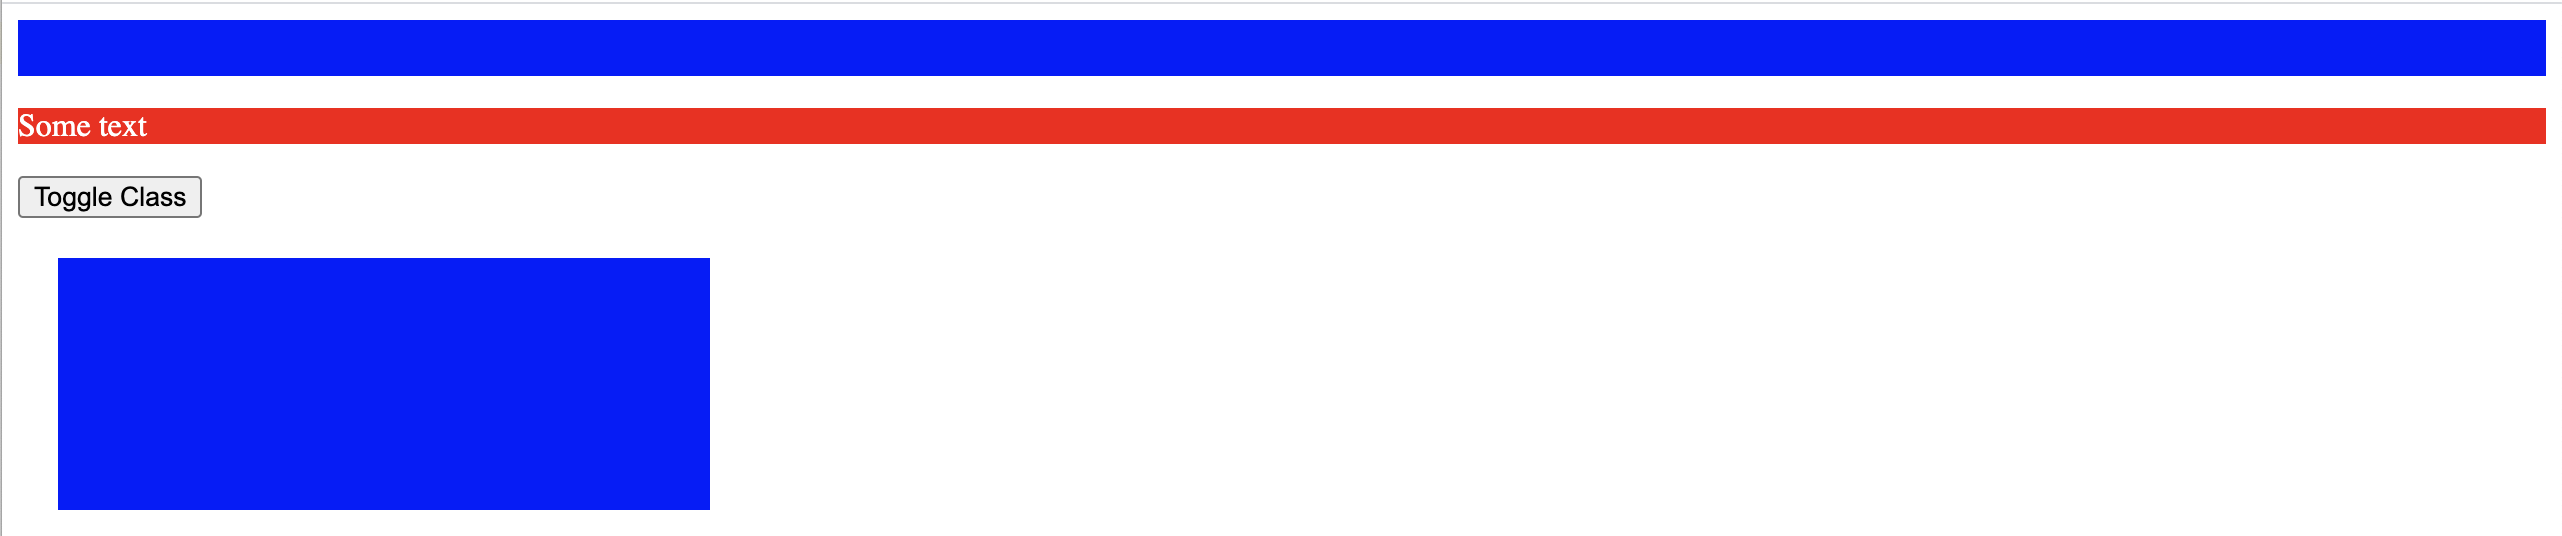
toggleClass()
The toggleClass() method toggles between adding/removing classes from the selected elements, meaning that if the specified class exists for the element, it is removed, and if it does not exist, it is added.
To demonstrate this in action, we will handle a button click event to toggle a class. We will learn more about events and their syntax in the coming modules.
<!DOCTYPE html>
<html lang="en">
<head>
    <meta charset="UTF-8">
    <title>Learn jQuery!</title>
    <link rel="stylesheet" href="static/css/so.css">
</head>
<body>
<!-- Start -->
<!--add css class-->
<div>Some text</div>

<!--toggle class-->
<p>Some text</p>
<button>Toggle Class</button>

<!-- End -->
<script src="https://code.jquery.com/jquery-3.5.1.min.js"></script>
<script src="static/js/so.js"></script>
</body>
</html>
.header{
    color: blue;
    font-size:x-large;
}
.red{
    color: red;
    font-weight: bold;
}
$(function () {
    //jQuery Code Below:
    $("div").addClass("header");
    // toggle class
    $("button").click(function () {
        $("p").toggleClass("red");
    });
});
The code above toggles the class name “red” upon clicking the button.
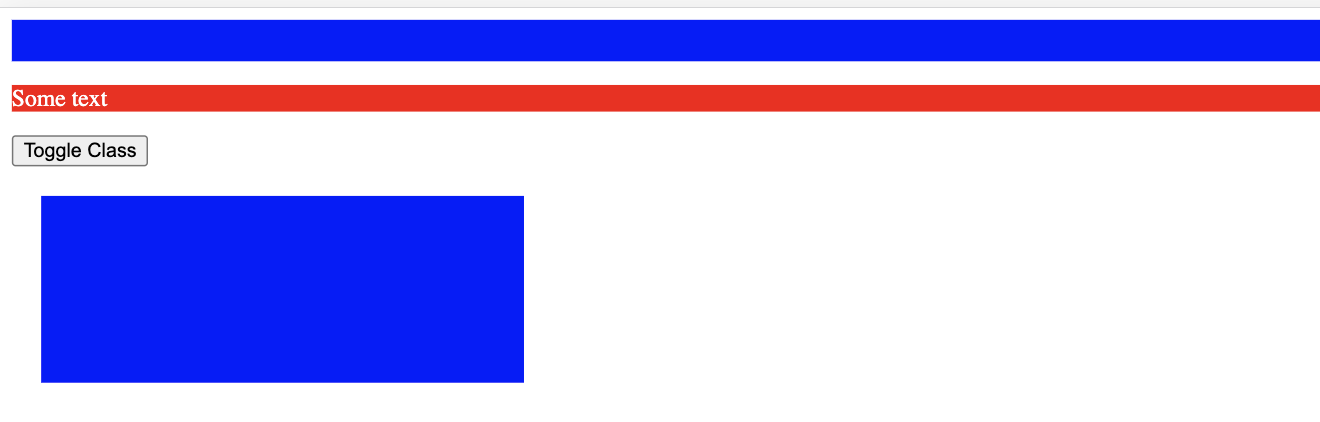
CSS Properties
CSS Properties
Similar to the html() method, the css() method can be used to get and set CSS property values. For example:
<!DOCTYPE html>
<html lang="en">
<head>
    <meta charset="UTF-8">
    <title>Learn jQuery!</title>
    <link rel="stylesheet" href="static/css/so.css">
</head>
<body>
<!-- Start -->
<!--add css class-->
<div>Some text</div>

<!--toggle class-->
<p>Some text</p>
<button>Toggle Class</button>

<!-- End -->
<script src="https://code.jquery.com/jquery-3.5.1.min.js"></script>
<script src="static/js/so.js"></script>
</body>
</html>
.header {
    color: blue;
    font-size: x-large;
}

.red {
    color: red;
    font-weight: bold;
}

p {
    background-color: red;
    color: white;
}
$(function () {
    //jQuery Code Below:
    $("div").addClass("header");
    // toggle class
    $("button").click(function () {
        $("p").toggleClass("red");
    });
    // css() method to get and set css property values
    alert($("p").css("background-color"));
    $("div").css("background-color","blue");
});

Multiple Properties
To set multiple CSS properties, the css() method uses JSON syntax, which is:
css({"property":"value","property":"value",...});
As you can see, the syntax consists of “property”:”value” pairs, which are comma separated and enclosed in curly brackets { }.
$("p").css({"color":"red","font-size":"200%"})
This will set the color and font-size properties of the paragraph.
You can specify any number of properties using this JSON syntax.
Dimensions
Dimensions
The width() and height() methods can be used to get and set the width and height of HTML elements.
Let’s set both the width and height of a div to 100px, as well as set a background color for it:
$("div").css("background-color", "red");
$("div").width(100);
$("div").height(100);
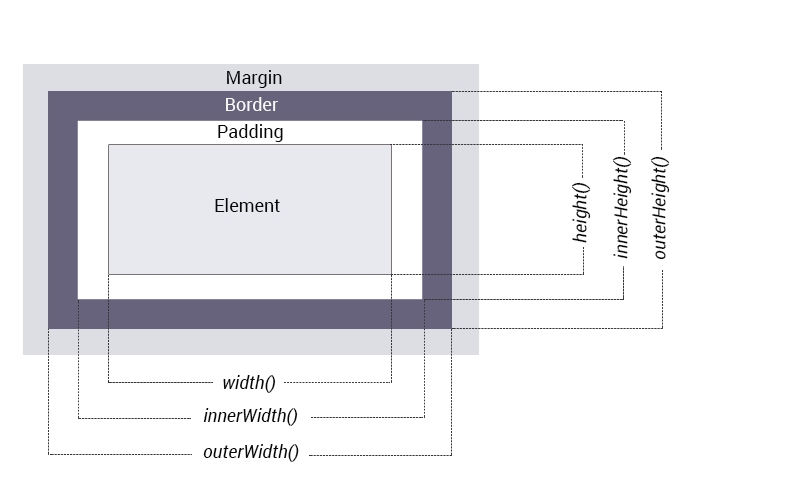
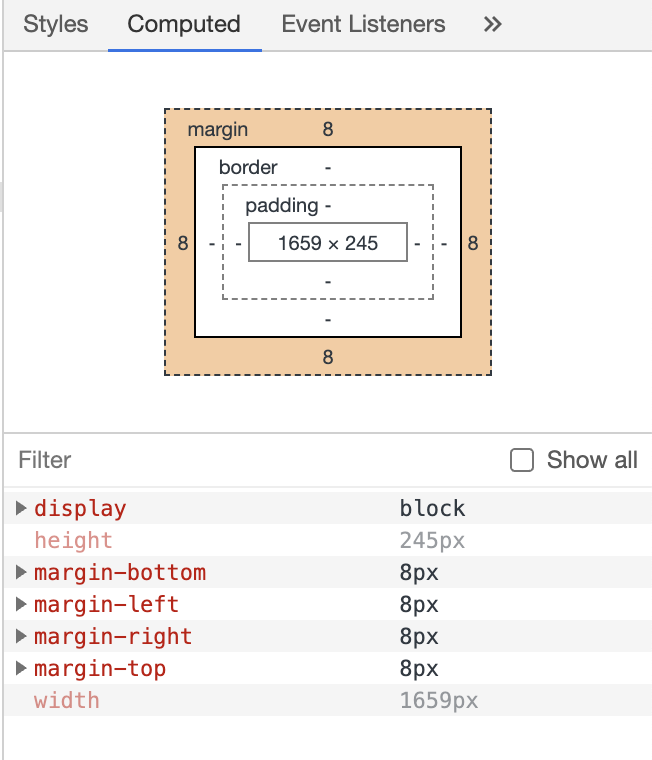
The width() and height() methods get and set the dimensions without the padding, borders and margins.
The innerWidth() and innerHeight() methods also include the padding. The outerWidth() and outerHeight() methods include the padding and borders. Check out this image to understand how they work:
The following example demonstrates how the methods work:
<!DOCTYPE html>
<html lang="en">
<head>
    <meta charset="UTF-8">
    <title>Learn jQuery!</title>
    <link rel="stylesheet" href="static/css/so.css">
</head>
<body>
<!-- Start -->
<!--add css class-->
<div>Some text</div>

<!--toggle class-->
<p>Some text</p>
<button>Toggle Class</button>

<div id="dimension"></div>

<!-- End -->
<script src="https://code.jquery.com/jquery-3.5.1.min.js"></script>
<script src="static/js/so.js"></script>
</body>
</html>
.header {
    color: blue;
    font-size: x-large;
}

.red {
    color: red;
    font-weight: bold;
}

p {
    background-color: red;
    color: white;
}

#dimension{
    width: 300px;
    height: 100px;
    padding: 10px;
    margin: 20px;
    border: 3px solid blue;
    background-color: red;
    color: white;
}
$(function () {
    //jQuery Code Below:
    $("div").addClass("header");
    // toggle class
    $("button").click(function () {
        $("p").toggleClass("red");
    });
    // css() method to get and set css property values
    alert($("p").css("background-color"));
    $("div").css("background-color", "blue");
    // dimension
    var txt = "";
    txt += "width: " + $("dimension").width() + "";
    txt += "height: " + $("#dimension").height() + "<br/>";
    txt += "innerWidth: " + $("#dimension").innerWidth() + "  ";
    txt += "innerHeight: " + $("#dimension").innerHeight() + "<br/>";
    txt += "outerWidth: " + $("#dimension").outerWidth() + "  ";
    txt += "outerHeight: " + $("#dimension").outerHeight();

    $("#dimension").html(txt);
});
Manipulating DOM
The DOM
When you open any webpage in a browser, the HTML of the page is loaded and rendered visually on the screen.
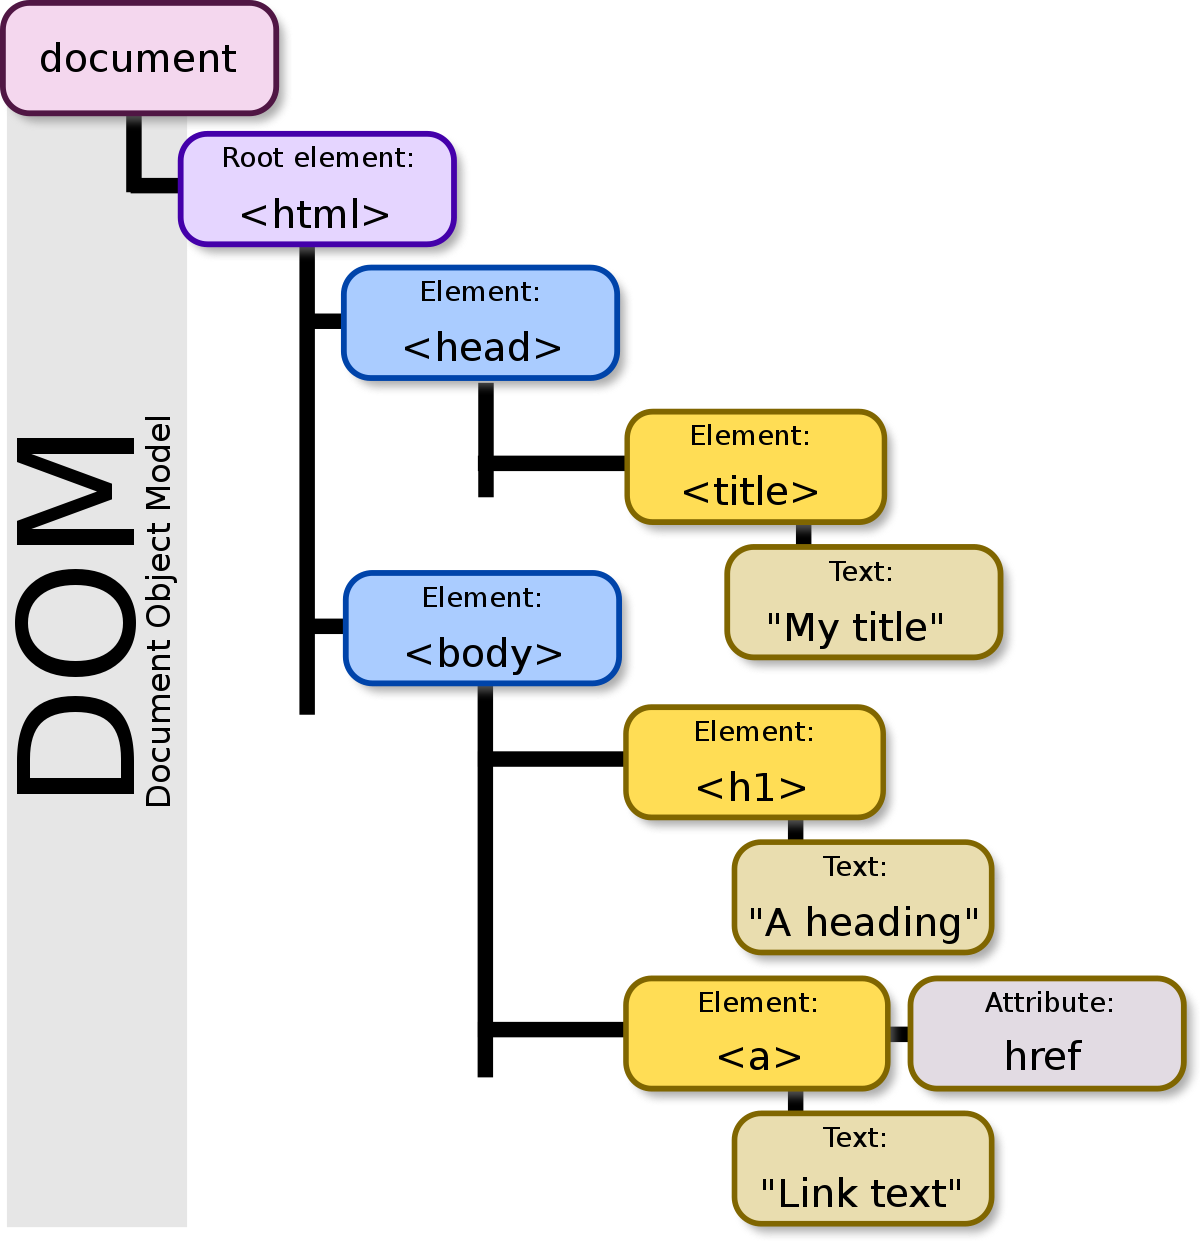
To accomplish this, the browser builds the Document Object Model (DOM) of that page, which is an object oriented model of its logical structure. The DOM of an HTML document can be represented as a nested set of boxes:
The DOM represents a document as a tree structure where HTML elements are interrelated nodes in the tre
Nodes can have child nodes. Nodes on the same tree level are called siblings.
jQuery traversing is the term used to describe the process of moving through the DOM and finding (selecting) HTML elements based on their relation to other elements.
jQuery makes it easy to traverse the DOM and work with HTML elements.
DOM Traversal
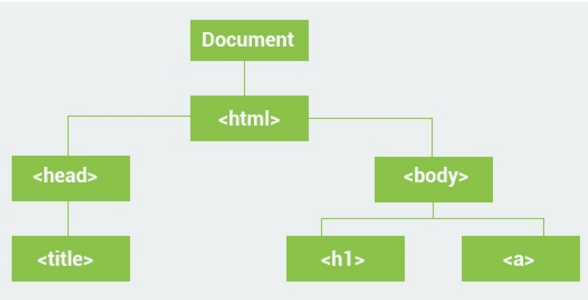
For example, consider the HTML represented by the following structure:
The <html> element is the parent of <body> and an ancestor of everything below it. The <body> element is the parent of the <h1> and elements. The <h1> and elements are child elements of the <body> element and descendants of <html>. The <h1> and elements are siblings (they share the same parent).
An ancestor is a parent, grandparent, great-grandparent, and so on. A descendant is a child, grandchild, great-grandchild, and so on. Siblings share the same parent.
Traversing
DOM Traversal
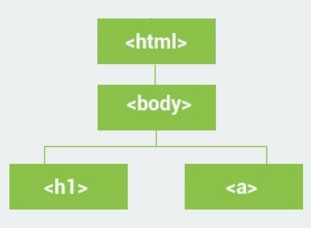
jQuery has many useful methods for DOM traversal. The parent() method returns the direct parent element of the selected element. For example:
<div> div element
  <p>paragraph</p>
</div>
var e = $("p").parent();
e.css("border","2px solid red");
The code above selects the parent element of the paragraph and sets a red border for it.
The parent() method can only traverse a single level up the DOM tree.
To get all ancestors of the selected element you can use the parents() method. For example:
The code above sets a red border for all parents of the paragraph.
Some of the most used traversal methods are presented below:
The eq() method can be used to select a specific element from multiple selected elements. For example, if the page contains multiple div elements and we want to select the third one:
$("div").eq(2);
The index numbers start at 0, so the first element will have the index number 0.
Removing Elements
Removing Elements
We remove selected elements from the DOM using the remove() method.For example:
<p style="color:red">Red</p>
<p style="color:green">Green</p>
<p style="color:blue">Blue</p>
$("p").eq(1).remove();
This removes Green, the second paragraph element.
You can also use the remove() method on multiple selected elements, for example
$(“p”).remove() removes all paragraphs.
The jQuery remove() method removes the selected element(s), as well as its child elements.
Removing Content
The empty() method is used to remove the child elements of the selected element(s). For example:
<div>
   <p style="color:red">Red</p>
   <p style="color:green">Green</p>
   <p style="color:blue">Blue</p>
</div>
div {
  background-color: aqua;
  width: 300px;
  height: 200px;
}
$("div").empty();
Events
Handling Events
Handling Events
JQuery provides an efficient way to handle events. Events occur when the user performs an action, such as clicking an element, moving the mouse, or submitting a form.
When an event occurs on a target element, a handler function is executed.
For example, let’s say we want to handle the click event on an element with id=”demo” and display the current date when the button is clicked. Using pure JavaScript, the code looks like:
var x = document.getElementById("demo");
x.onclick = function(){
  document.body.innerHTML = Date();
}
The same event could be handled using jQuery with the following code:
$("#demo").click(function(){
  $("body").html(Date());
});
As you can see, the jQuery code is shorter and easier to read and write. Notice, that the event name is provided without the “on” prefix (i.e., onclick in JavaScript is click in jQuery).
The function that is executed when an event is fired is called the event handler.
Common Events
The following are the most commonly used events:
Mouse Events: click occurs when an element is clicked. dblclick occurs when an element is double-clicked. mouseenter occurs when the mouse pointer is over (enters) the selected element. mouseleave occurs when the mouse pointer leaves the selected element. mouseover occurs when the mouse pointer is over the selected element.
Keyboard Events: keydown occurs when a keyboard key is pressed down. keyup occurs when a keyboard key is released.
Form Events: submit occurs when a form is submitted. change occurs when the value of an element has been changed. focus occurs when an element gets focus. blur occurs when an element loses focus.
Document Events: ready occurs when the DOM has been loaded. resize occurs when the browser window changes size. scroll occurs when the user scrolls in the specified element.
As an example, let’s change the content of a div when the user types in an input field. To do that, we need to handle the keydown event, which occurs when a key on the keyboard is pressed:
<input type="text" id="name" />
<div id=msg>

</div>
$("#name").keydown(function()){
                   $("msg").html($("#name").val());
                   };
The code above handles the keydown event for the element with id=”name” and assigns the content of the div with id=”msg” the value of the input field.
Handling Events
$( "p" ).on( "click", function() {
  alert("clicked");
});
As you can see, the event name is passed as the first argument to the on() method. The second argument is the handler function.
The on() method is useful for binding the same handler function to multiple events. You can provide multiple event names separated by spaces as the first argument. For example, you could use the same event handler for the click and dblclick events.
off()
You can remove event handlers using the off() method.
$("div").on("click", function() {
  alert('Hi there!');
  $("div").off("click");
});
The argument of the off() method is the event name you want to remove the handler for.
The Event Object
The Event Object
Every event handling function can receive an event object, which contains properties and methods related to the event:
- pageX, pageY the mouse position (X & Y coordinates) at the time the event occurred, relative to the top left of the page.
- type the type of the event (e.g. “click”).
- which the button or key that was pressed.
- data any data that was passed in when the event was bound.
- target the DOM element that initiated the event.
- preventDefault() prevent the default action of the event (e.g., following a link).
- stopPropagation() Stop the event from bubbling up to other elements.
<!DOCTYPE html>
<html lang="en">
<head>
    <meta charset="UTF-8">
    <title>Learn jQuery!</title>
    <link rel="stylesheet" href="static/css/so.css">
</head>
<body>
<!-- Start -->
<!--add css class-->
<div>Some text</div>

<!--toggle class-->
<p>Some text</p>
<button>Toggle Class</button>

<div id="dimension"></div>

<a href="https://azat.ai">Click Me</a>


<!-- End -->
<script src="https://code.jquery.com/jquery-3.5.1.min.js"></script>
<script src="static/js/so.js"></script>
</body>
</html>
$(function () {
    //jQuery Code Below:
    $("div").addClass("header");
    // toggle class
    $("button").click(function () {
        $("p").toggleClass("red");
    });
    // css() method to get and set css property values
    alert($("p").css("background-color"));
    $("div").css("background-color", "blue");
    // dimension
    var txt = "";
    txt += "width: " + $("dimension").width() + "";
    txt += "height: " + $("#dimension").height() + "<br/>";
    txt += "innerWidth: " + $("#dimension").innerWidth() + "  ";
    txt += "innerHeight: " + $("#dimension").innerHeight() + "<br/>";
    txt += "outerWidth: " + $("#dimension").outerWidth() + "  ";
    txt += "outerHeight: " + $("#dimension").outerHeight();

    $("#dimension").html(txt);

    // the event object
    $("a").click(function (event) {
        alert(event.pageX);
        event.preventDefault();
    })
});
The code above alerts the mouse position at the time of the click and prevents following the link.
As you can see, the event object is passed to the event handler function as an argument.
Trigger Events
We can also trigger events programmatically using the trigger() method. For example, you can trigger a click event without the user actually clicking on an element:
$("div").click(function() {
   alert("Clicked!");
});
$("div").trigger("click");
This code triggers the click event for the selected element.
The trigger() method cannot be used to mimic native browser events, such as clicking on a file input box or an anchor tag. Only events in the jQuery event system can be handled.
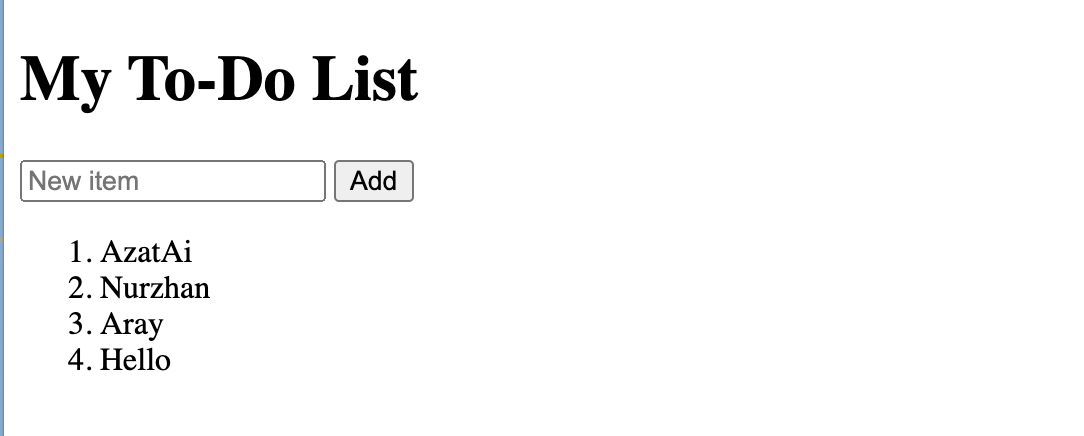
Creating a To-DO List
To-Do List
Let’s create a To-Do list project using the concepts we have learned. The To-Do list will be able to add new items to a list, as well as remove existing items.
<!DOCTYPE html>
<html lang="en">
<head>
    <meta charset="UTF-8">
    <title>Learn jQuery!</title>
    <link rel="stylesheet" href="static/css/so.css">
</head>
<body>
<!-- Start -->

<h1>My To-Do List</h1>
<input type="text" placeholder="New item">
<button id="add">Add</button>
<ol id="mylist"></ol>


<!-- End -->
<script src="https://code.jquery.com/jquery-3.5.1.min.js"></script>
<script src="static/js/so.js"></script>
</body>
</html>
Now, having the HTML ready, we can start writing our jQuery code.
First, we handle the click event for the button:
$(function () {
    // handle the click event for the button;
    $("#add").on("click",function (){
        // event handler
    });
});
Inside the event handler we select the value of the input field and create a new <li> element, adding it to the list:
$(function () {
    // handle the click event for the button;
    $("#add").on("click", function () {
        // event handler
        var val = $("input").val();
        if (val !== '') {
            var elem = $("<li></li>").text(val);
            $("elem").append("<button class'rem'>X</button>");
            $("#mylist").append(elem);
            $("input").val(""); // clear the input
        }
    });
});
The code above takes the value of the input field, assigns it to the val variable. The if statement checks that the value is not blank and then creates a new <li> element. A button for removing it is added, after which the newly created element is added to the <ol id="mylist"> list.
$(function() {
    $("#add").on("click", function() {
        var val = $("input").val();
        if(val !== '') {
            var elem = $("<li></li>").text(val);
            $(elem).append("<button class='rem'>X</button>");
            $("#mylist").append(elem);
            $("input").val("");
        }
    });
});
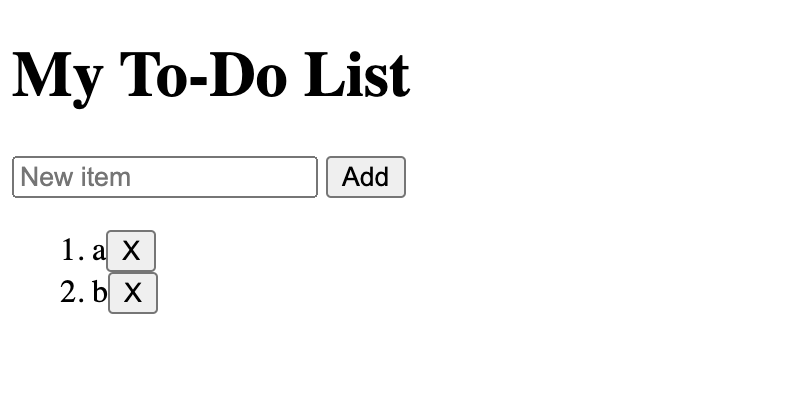
All that is left to do is handle the click event on the class=”rem” button and remove the corresponding <li> element from the list.
$(".rem").on("click",function () {
    $(this).parent().remove();
});
Remember, this is the current object. The code above removes the parent of the current object, which in our case is the parent of the remove button, the <li> element.
$(function() {
    $("#add").on("click", function() {
        var val = $("input").val();
        if(val !== '') {
            var elem = $("<li></li>").text(val);
            $(elem).append("<button class='rem'>X</button>");
            $("#mylist").append(elem);
            $("input").val("");
            $(".rem").on("click", function() {
                $(this).parent().remove();
            });
        }
    });
});

Effects
Hide/Show
Hide/Show
jQuery has some easy-to-implement effects to create animations. The hide() and show() methods are used to hide and show the selected elements. The toggle() method is used to toggle between hiding and showing elements.
<!DOCTYPE html>
<html lang="en">
<head>
    <meta charset="UTF-8">
    <title>Learn jQuery!</title>
    <link rel="stylesheet" href="static/css/so.css">
</head>
<body>
<!-- Start -->

<p>Toggle</p>
<div>This content toggles!</div>


<!-- End -->
<script src="https://code.jquery.com/jquery-3.5.1.min.js"></script>
<script src="static/js/so.js"></script>
</body>
</html>
.header {
    color: blue;
    font-size: x-large;
}

.red {
    color: red;
    font-weight: bold;
}

p {
    background-color: red;
    color: white;
}

#dimension{
    width: 300px;
    height: 100px;
    padding: 10px;
    margin: 20px;
    border: 3px solid blue;
    background-color: red;
    color: white;
}
$(function() {
    $("p").click(function (){
        $("div").toggle();
    })
});
The hide/show/toggle methods can take an optional argument, speed, which specifies the animation speed in milliseconds. For example, let’s pass 1000 millisecond as the speed argument to the toggle() method:
$(function() {
    $("p").click(function (){
        $("div").toggle(1000);
    })
});
The hide/show/toggle methods can also take a second optional parameter callback, which is a function to be executed after the animation completes.
Fade In/Out
Similar to the hide/show methods, jQuery provides the fadeIn/fadeOut methods, which fade an element in and out of visibility. Just like the toggle() method switches between hiding and showing, the fadeToggle() method fades in and out. Let’s see fadeToggle() in action:
$(function() {
    $("p").click(function (){
        $("div").fadeToggle(1000);
    })
});
Just like toggle(), fadeToggle() takes two optional parameters: speed and callback.
Another method used for fading is fadeTo(), which allows fading to a given opacity (value between 0 and 1). For example: $(“div”).fadeTo(1500, 0.7);
Slide Up/Down
The slideUp() and slideDown() methods are used to create a sliding effect on elements. Again, similar to the previous toggle methods, the slideToggle() method switches between the sliding effects and can take two optional parameters: speed and callback.
$(function() {
    $("p").click(function (){
        $("div").slideToggle(1000);
    })
});
animate()
animate()
The animate() method lets you animate to a set value, or to a value relative to the current value.
You need to define the CSS properties to be animated as its parameter in JSON format (“key”:”value” pairs).
The second parameter defines the speed of the animation.
For example, the following code animates the width property of the div in 1 second to the value 250px:
Note the JSON format for providing the CSS parameters. The JSON syntax was also used in the previous modules when manipulating CSS properties.
You can animate any CSS property using the above mentioned syntax, but there is one important thing to remember: all property names must be camel-cased when used with the animate() method (camelCase is the practice of writing compound words or phrases such that each word or abbreviation begins with a capital letter with the first word in lowercase). You will need to write paddingLeft instead of padding-left, marginRight instead of margin-right, and so on.
Multiple properties can be animated at the same time by separating them with commas.
Multiple properties can be animated at the same time by separating them with commas. For example:
$("div").animate({
  width: '250px',
  height: '250px'
}, 1000);
It is also possible to define relative values (the value is then relative to the element’s current value). This is done by putting += or -= in front of the value:
$("div").animate({
  width: '+=250px',
  height: '+=250px'
}, 1000);
Animation Queue
By default, jQuery comes with queue functionality for animations.
This means that if you write multiple animate() calls one after another, jQuery creates an “internal” queue for these method calls. Then it runs the animate calls one-by-one.
$(function() {
    $("p").click(function (){
        $("div").slideToggle(1000);
    });
    var div = $("div");
    div.animate({opacity: 1});
    div.animate({height: '+=100px', width: '+=100px', top: '+=100px'}, 500);
    div.animate({height: '-=100px', width: '-=100px', left: '+=100px'}, 500);
    div.animate({height: '+=100px', width: '+=100px', top: '-=100px'}, 500);
    div.animate({height: '-=100px', width: '-=100px', left: '-=100px'}, 500);
    div.animate({opacity: 0.5});
});
Each animate() method call will run one after another.
Remember, to manipulate the position of elements, you need to set the CSS position property of the element to relative, fixed, or absolute.
The animate() method, just like the hide/show/fade/slide methods, can take an optional callback function as its parameter, which is executed after the current effect is finished.
Creating a Drop-Down Menu
Drop-Down Menu
Let’s create a simple drop-down menu that will open upon clicking on the menu item.
<!DOCTYPE html>
<html lang="en">
<head>
    <meta charset="UTF-8">
    <title>Learn jQuery!</title>
    <link rel="stylesheet" href="static/css/so.css">
</head>
<body>
<!-- Start -->

<div class="menu">
    <div id="item">Drop-Down</div>
    <div id="submenu">
        <a href="#">Link 1</a>
        <a href="#">Link 2</a>
        <a href="#">Link 3</a>
    </div>
</div>
<!-- End -->
<script src="https://code.jquery.com/jquery-3.5.1.min.js"></script>
<script src="static/js/so.js"></script>
</body>
</html>

$(function () {
    $("#item").click(function () {
        $("#submenu").slideToggle(500);
    });
});

The code above handles the click event of the id=”item” element and opens/closes the submenu in 500 milliseconds.